While SQL Server Management Studio (SSMS) provides a robust graphical user interface (GUI), the commands you’re going to use the most to control databases and the data within them in SQL Server are going to be done through T-SQL. Therefore, you really need to spend time learning how to write, read, and edit T-SQL. Previous posts in the Fundamentals series have showed how to INSERT, UPDATE and DELETE data using T-SQL. Next, we’re going to learn SELECT. However, I want to show you a crutch you can use as you get started learning how to write T-SQL, the Query Designer window.
The instruction on this topic is only meant to provide a mechanism to focus on the more important topic, learning T-SQL. However, this may be an easier path for some people to get started.
Query Designer
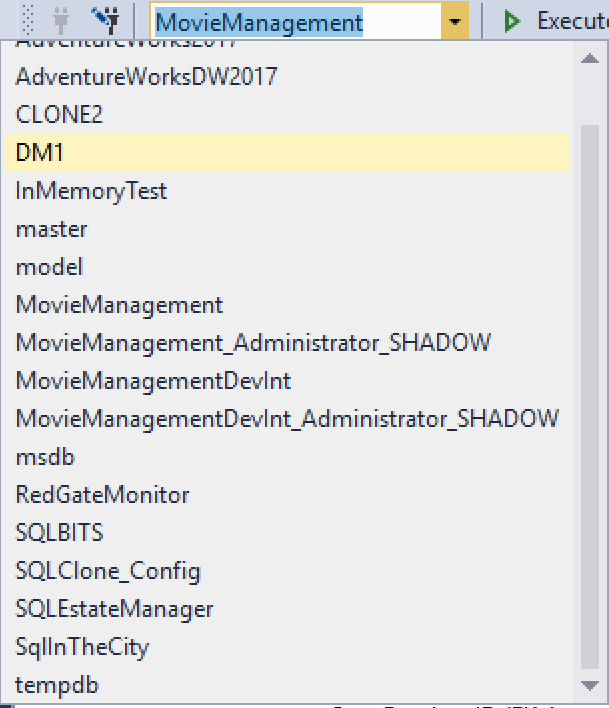
The Query Designer Interface, is just a way to generate T-SQL. It’s actually not doing anything that you couldn’t do for yourself. The way to open it traditionally is to start a new query. There are number of ways to do this. The easiest is to click on the “New Query†button on the default toolbar. If you have not already done so, connect to your instance and then click on the “New Query†button. This will open the query, but, it won’t be set to your database. Usually, by default, it will be set to the system database called master (or, if your login has a different default database, that database). You can change the database context of the query window by selecting from the drop down list on the query tool bar. See the picture of this in action in here:
This shows you don’t always have to navigate to the database in the Object Explorer window first. Remember, there are always multiple ways to get things done in SSMS.
With the Query Editor window open, a new menu labeled “Query†is available. Click on this menu and select “Design Query in Editor…†from the menu choices there. This will open the Query Designer window and it will immediately be set up to allow you to pick which table or tables you’d like to include in this query just like this:
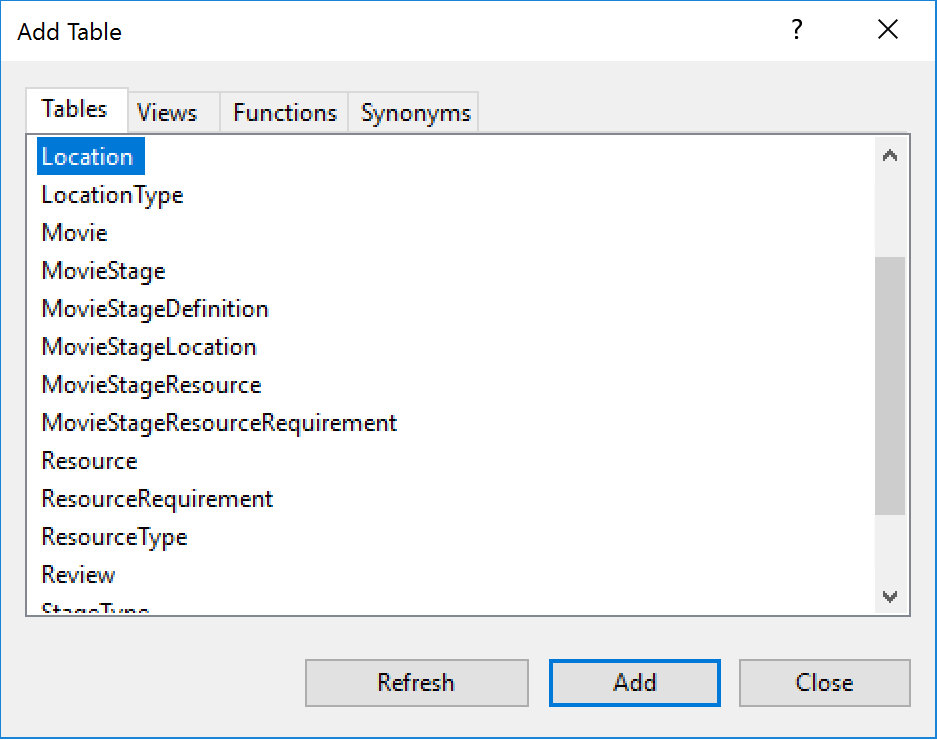
This window allows you to select the table that you would like to query. You can add multiple tables if you needed to. You can also click on the tabs across the top of the screen and choose other types of objects that can be queried to the Query Designer window. Select a table and click on the Add button then click the Close button.
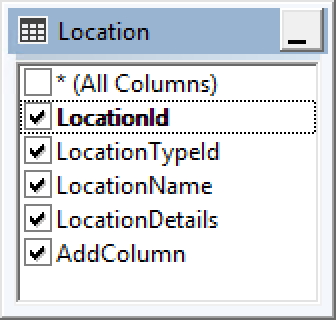
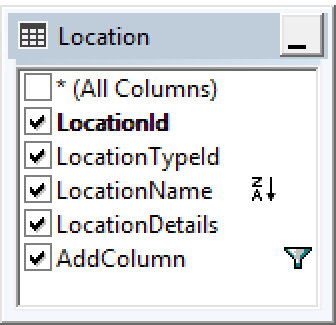
The Query Designer window opens with the table you selected. There are three basic areas that make up the Query Designer window; the Diagram, Criteria and SQL. The diagram is at the top and includes any tables you’ve added. In the diagram you can click on the check boxes next to columns to pick which columns you’d like to include in the query. There’s also the option to include all columns by using what is referred to as the star. It’s just an asterisk, but it’s the code in SQL Server for everything when referring to columns. You can list each column or you can list them all by selecting the star. It’s a best practice to always list each column, even if you are using all of the columns. It’s considered poor practice to use the star to define the columns, even though that can be a little bit easier.
As you click on the check boxes next to the column names you can see the other panes of the Query Designer window getting filled in. The same works if you deselect columns. The table in the window can be resized so that you can see all the columns and the full name. Note that the schema is not displayed in front of the table name, but instead is in parenthesis after the table name in the title bar of the window that represents the table. This shows the diagram pane with all the columns selected.
Click on the OK button at the bottom of the Query Designer and you’ll see a full fledged SQL statement in the query window, ready to be executed. But, what if you wanted to add a WHERE clause? That’s where the second pane, Criteria, comes in to play.
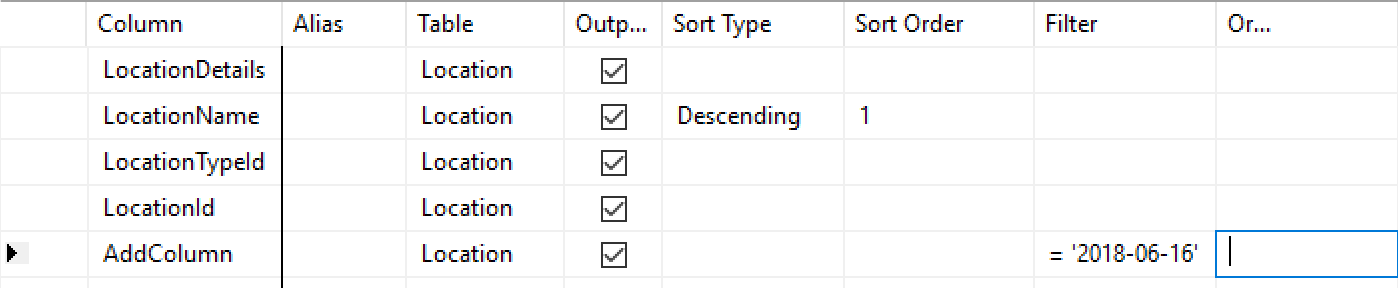
The Criteria pane allows you to manipulate the columns and add sorting and filtering. SQL Server never guarantees the order that data will be returned unless you provide specific sorting criteria through what is called an ORDER BY clause. The “Sort Type†and “Sort Order†columns in the Query Designer allow you to specify that value. For example, let’s assume you need to order by the a time column and you want it in reverse order, showing the newest values first. First, you select the “Sort Type.†In order to get the order you want, you need to select the value Descending. Then you can modify the Sort Order column, if you are sorting by more than one column. In this case only the one column is there. Note, the TSQL pane now shows code with the ORDER BY clause included.
But we still need a WHERE clause. If you go to the “Filter†column for a column, you can type in a value. Try typing in a date, 2018-06-16. Then click somewhere else on the screen or tab to change focus to another column. Immediately SQL Server will help you buy replacing what you typed with “= ‘6/16/2018’.†And you’ll see even more in the SQL statement. Your Criteria pane should now look something like this:
If you look back up at the Diagram pane, you’ll find that it has changed from the things you’ve done. Now there is a little funnel icon next to the column, representing the filter criteria or WHERE clause that you’ve given it. And there is a little icon with letters ordered Z to A representing the ORDER BY clause that you put on the other column:
Finally you’ll need to look at the bottom pane, the SQL pane. This reflects all the selections that you’ve made above. But, you can edit the SQL statement directly. For example, assume that for this query you actually don’t need to see a column. In the SQL pane, select the comma and the column and delete them. Now, if you click outside the SQL pane, you’ll notice that the other two panes no longer have that column selected. So each pane can affect the others.
With all the criteria selected as outlined, your Query Designer window should look something like this (click to make bigger):

The query defined shows the columns you selected in the SELECT statement. The FROM clause shows the table, including the schema, that you put into the Diagram pane. The WHERE clause shows the Filter information you added to the Criteria pane. The WHERE clause in this case is not the usual one column equals one value that you’ve seen so far. The SQL generated by the Query Design window can be overly verbose. It has added a parenthesis around the WHERE clause. A parenthesis in SQL Server, like one in math, can change the order in which expressions are evaluated. If you had multiple expressions in your WHERE clause, placing some of them in parenthesis can affect the order in which SQL Server will evaluate the WHERE clause, but in this case it’s completely unnecessary. Since the column in question, TransactionDate, is a Date data type, you have to deal with the fact that you’re typing a string with a date value, not an actual date. The Query Designer has done this by using the CONVERT function to make the string into a DATETIME value because that is the lowest common denominator when dealing with dates and times. There are better ways to do this and we’ll explore them in later blog posts in this series. Finally, the ORDER BY clause shows the column you selected to order the results by and the direction of that ordering, DESC for descending.
You can click the OK button now. The window will close and the T-SQL statement will be moved directly into the Query window in SSMS. You can now execute your query, us the key stroke CTL-E, to see the results in the Results tab. You’ll see only the columns defined and the data will be ordered in the direction you specified.
Conclusion
That’s the basics for using the Query Designer to build a query for you. However, as you saw, this is just a method for generating a T-SQL statement. You can generate that T-SQL statement yourself and save yourself a little time and provide a lot more control. However, the strength of the Query Designer is the fact that it will show you the T-SQL as you select tables, columns and define criteria like a FROM clause. The Query Designer will even provide JOIN criteria. This makes the Query Designer a good way to learn T-SQL for some people.
[…] Read the entire article at the source link… Grant Fritchey […]
That’s how I ended up learning T-SQL back in the day. In fact the scripting button in SSMS is still how I learn some T-SQL functions.
Scripting button is handy for quick syntax on stuff I don’t/can’t keep in my head too.
One of the first jobs I had where I actually wrote T-SQL didn’t allow any production code to come from the designer. That was in the old Enterprise Manager and the SQL it generated was always a bit suspect. Since then, I have never even looked at this.
I only use it now as a teaching tool. It is one way for some people to learn T-SQL. It’s certainly not for experienced, knowledgeable people to use. However, that’s why this post is labeled as fundamentals.
[…] my previous Database Fundamentals post, I showed you how to use the Query Designer to build a query. That was a SELECT statement. The […]
[…] my previous Database Fundamentals post, I showed you how to use the Query Designer to build a query. That was a SELECT statement. The […]
Query-Builder ? https://www.codeproject.com/Tips/1060170/User-Responsive-Web-Query-Builder-using-ASP-NET ?
Never tried that one. There is one built into SSMS.
[…] my prior Databases Fundamentals publish, I confirmed you how to use the Question Designer to construct a query. That was a Pick out […]
[…] my previous Database Fundamentals write-up, I confirmed you how to use the Query Designer to establish a question. That was a Select […]